Obviously the bike will need rust treatment and a respray so I thought I'd use this post to mention my approach to antirusting.
Generally, if it's a surface that shows, then I wire brush loose rust and rub with 400 wet and dry. I then degrease in meths and treat the rust with Jenolite. That's followed by an etch primer, filler primer (as needed). This is rubbed down with P1000 grit wet and dry. Where the filler primer wasn't enough to fill eg serious rust pitting, I use a skim of P1000 filler, rub down and reprime. Finally, I apply two coats of coloured paint and a clear lacquer. I have recently found an acid etch filler primer that cuts one stage out.
Where the surface doesn't show, as inside the forks or under the mudguards, I prepare as above but treat with metalmorphosis rust converter which dries to a flexible coat converting and sealing in the rust. I then spray with high zinc anti rust primer followed by stonechip or underseal. Inaccessible surfaces such as inside the frame are treated with waxoyl using a flexible spray extension tube.
I should add that Ford Dove grey and Ford Royal blue are very close matches to the original NSU colours and a fraction of the price of remixed classic colours. I don't think the names are coincidence, I suspect they may actually be the same paint. Both are indistinguishable from original colours if used as touch up over the original paint, but the grey in particular appears too yellow when used over grey primer. It may be that an intermediate coat of white would help prevent this effect.
Front mudguard
Whilst I was waiting for parts I started to strip the mudguards for repainting. The NSU crest at the front is held on by two pins that are fixed at the back with these plates. The equivalent of star lock washers today.
 |
| Rear of bumper, NSU rest fixing pins and plates |
There were two small cracks just commencing that I sealed with weld and a slight dent that needed to be folded out. The rust pitting required filling as high build primer couldn't cope with it. I also found the external seam was tricky to access with a spray so I worked primer in there with a small brush. Id like to seal this seam but I'm not sure what to use as I want it over-painted and invisible.
 |
| Working antirust primer into the seam. |
 |
| Finished bumper. |
Frame
As I had already removed the forks, I could prepare the headstock as I didn't want to damage it once it had been repainted. Using a long drift I was able to tap out the lower bearing cup.
... which dropped free.
The corrosion inside this cup was obvious.
I also noticed a small crack in the turn bump-stop bracket. As I have bought new rubber stops I'd like this repaired. I had intended to repair this before spraying but in the event I forgot and had gone through my anti-rust, prime and first coat procedures before I remembered...Duhh!
 |
| Crack in bump-stop bracket. |
 |
| Masked off the upper bearing cup as I'm not changing this one and cover the ID plate. |
Sadly this meant I had to wire brush off the new paint and weld up the crack and grind it back.
 |
| Crack repaired |
Removing mudguard and carrier
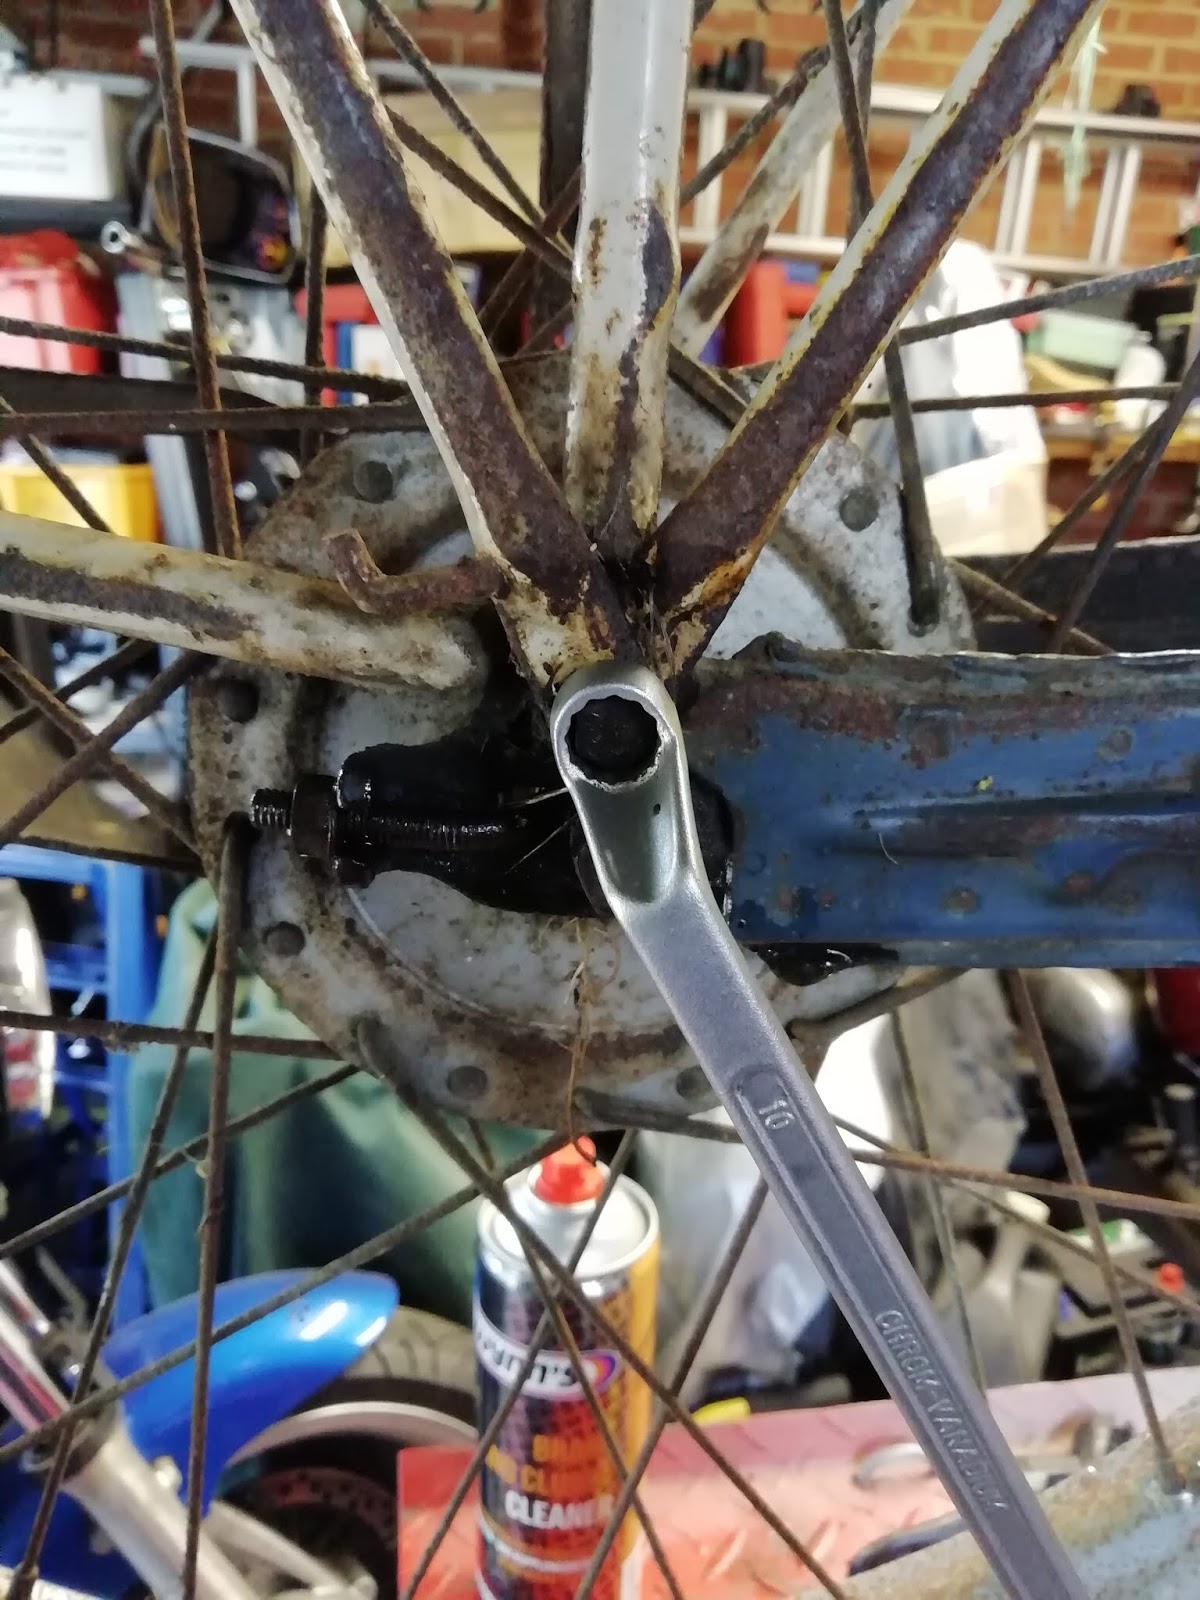
The rear mudguard is held on by two vertical stays and a U shaped horizontal stay. These share their attachment to the forks with the two struts holding the carrier. These do not need to be removed to release the wheel, but I took them off anyway as I wanted to repaint the mudguard.
 |
| Bit crowded on the fork! Rear axle nut (lower) and upper bolt securing rear mudguard stays and carrier |
 |
| Removing the mudguard stays and carrier struts |
There is an additional nut and bolt securing the carrier to the top of the rear mudguard. I suspect that this should be converted to a weld nut as its very awkward to unscrew unless you have also removed the rear wheel.
 |
| Carrier to mudguard nut and bolt. |
The rear carrier can now be lifted away and this leaves the mudguard, with its stays attached, held only by the toolbox at the front. This is a simple clip fit onto the seat post and so can be clipped off and removed with the mudguard. The toolbox itself is removed by unscrewing the two M6 screws accessible from inside the rear mudguard. The upper one of these is an M6 cross head cheesehead screw with a a nut inside the toolbox, whereas the lower is an M6 self-tapper. In my case the toobox was pretty much undamaged and even had its lid so I put it aside.
The mudguard stays are held on to the mudguard by M4 cheesehead slotted machine screws with nuts inside. In my case all bar one were rusted solid and had to be cut off. I will get new to replace them.
The RHS stay also carries the wire feed to the rear light held inside small welded clips. The wire then passes inside the rear mudguard where it is secured by more welded clips. These can be opened by levering with a small screwdriver to release the wire
 |
| Rear light wire feed inside mudguard stay and mudguard. caption |
 |
| Rear Light mounting screws inside the rear mudguard. |
The Rear light is at this stage still attached to the mudguard but is removed by undoing the two mounting screws inside the mudguard. Again these were slotted cheesehead screws which seems an odd choice for an area prone to corrosion. Luckily I was able to unscrew both and remove the light. I will deal with the light and its problems in a separate post.
 |
| Removing the rear light. |
The rear mudguard was now free. Checking it I could see that it had a couple of problems: it was cracked up towards both vertical stay mounting holes. The LHS was a minor issue but the RHS was worse. Both needed welding.
 |
| Crack to mudguard stay mounting holes on RHS |
Damage was easier to see once the area had been abraded. I welded this up and welded a reinforcement washer on the inside.
 |
| Damage more visible after grinding back. |
Towards the front LHS of the mudguard a large piece of padding had been inserted. This appeared to be because the welded seam in the mudguard had separated and I assume that this stopped the vibration. I removed the foam packing and cleaned up the area before welding the seam back together.
 |
| Foam inserted in mudguard split seam |
 |
| Removing the bodger's packing |
I was then able to sand the mudguard, fill it where necessary and repaint. A word of warning though- do not ever use Hammerite primer- it appears to be incompatible with any paint other than more Hammerite! I used it because I had nothing else at the time but eventually I had to remove it all from the koutside with paint stripper and start again! I left it on the inside of the mudguard and oversprayed that with a coat of white Hammerite. This I then covered in grey stonechip. After three coats I got an acceptable finish
The rear number plate
Nothing much to say here, the plate was bent and dented which I attempted fix by careful hammering. It was also badly pitted with rust so I wire brushed it treated it with jenolite and then skimmed the rusty areas with P1000 filler which could be sanded back.
Finally it was primed again and over-coated in satin black. I treated the rear of the plate with grey stonechip.
 |
| Number plate preparation- filling the rust damage with fine surface filler. |
Preparing the Rear frame.
I removed the small plastic trim piece at the base of the seat tube. This is held on with really meaty M6 cheese-head screws (cross-head). I don't know why the attachment needs to be so strong. The trim has metal eyelets around each screw hole presumably to stop it from being crushed. Predictably in my case one was missing, leaving only a rusty tell tale to show it had ever existed! I will need to find a replacement.
 |
| Missing M6 Eyelet |
It was also clear that the trim piece has cracked at the front and at some stage had been poorly repainted- two more jobs to deal with.
 |
| Crack at front of seat tube trim. |
The rear light wire feed is also secured to the inside of the rear fork (RHS). Its held there by spring clips. Press down on the top and lever backwards to pop these out.
 |
| Rear light wire feed secured to inside of RHS fork arm |
 |
| Spring clips on wire. |
The wiring loom (such as it is) was now actually free since I had disconnected the headlamp nacelle and magneto earlier. The whole loom looks to be cracked and old so I will slip new wires into the sleeves and replace it as much as possible.
I also removed the motor from the frame, I hadn't meant to do that but in the end I thought now was as good a time as any so went ahead. That is described in the section "Considering the motor".
The rear frame was now clear so it was degreased and de-rusted before being treated with Jenolite, Primed and sprayed in Royal blue.
Rear Carrier
The carrier is incredibly complicated for what is a simple job. Mine has two hinged clamps, one of which is sprung and is more reminiscent of a bicycle carrier than a motorcycle rack. It's not really clear how these clamps work together and although the springs could be disconnected, it looks like a fiddly job.
I decided to short cut this so I degreased the rack thoroughly and then soaked it in 2% citric acid for 3 days. This lifted the rust and loose paint. The rack was then rinsed and wire brushed before being treated with Jenolite and Kurust before cleaning in meths, priming with zinc primer, and repainting in Dove Grey.
Not perfect, the rack really needed complete disassembly and sandblasting but this process should at least stabilise it and look OK.


Good read and some helpful info. I have just stripped a N version down and am about to commence down the same road. Be good to see any updates on yours.
ReplyDeleteRegards
Bob
Thanks Bob, glad dome was helpful. I'm nearly finished but lockdown stopped me in my tracks as I couldn't travel to the workshop. Seem to be able to do so now (maybe) so I hope to be able yo start again soon. I was half way thru rebuilding a crankshaft and a second motor just to see if I could do it so it's a bit daunting trying to pick up the pieces!
Delete